Plate Joiners For Perfect Fit

The Ease Of Joining When You Have The Right Tool

Once found almost exclusively in cabinet shops, plate joiners (sometimes called biscuit joiners) have become increasingly common in home workshops and on construction sites, and for good reason: they make the process of joining two boards together fast, simple, and safe.

Plate Joiners ForPerfect Fit
Useful for making butt joints, miter joints, and edge-to-edge joints, plate joinery can be used with just about any type of wood, as well as with materials ranging from particle board to solid-surface countertops. With a plate joiner, you can quickly make bookshelves and cabinets, reinforce many of the joints made by trim carpenters, or invent entirely new applications.

How Does It Work?

Plate joiners are relatively small, barrel-shaped tools that take up less room in the toolbox than a circular saw. They are designed to do only one thing: cut crescent-shaped slots of various sizes. But plate joinery is actually a two-part process. Once you've made slots in the two pieces to be joined, the second step is to put glue in the slots and insert biscuits into the mated pieces.

Essential Woodworking Machines & Power Tools

Woodworking machines are precise power tools that are typically far too large and heavy to be portable, which means that they're rarely found on a job site. Instead, these tools will be most likely confined to your wood shop. Fortunately, they're so useful that you'll be quite willing to build your fine woodworking projects in your wood shop and carry the projects to your final destination.

Essential Woodworking Machines & Power Tools

While there are many additional woodworking machines not discussed in this article, the following are probably the most versatile fine woodworking machines & tools that are designed primarily for use in the wood shop.

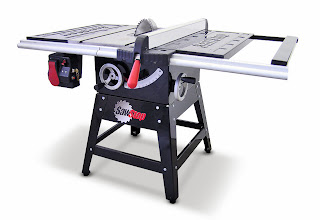
Table Saws: The Workhorses Of The Wood Shop

The Table Saw is undoubtedly the most versatile machine in any shop, and should be the woodworker's first machine purchase. A good table saw becomes the centerpiece of the workshop, as the woodworker uses it to rip, square, miter, groove, shape and join pieces. A quality table saw will make completing nearly any woodworking project easier.

Table Saws: The Workhorses Of The Wood Shop

Table Saw Features

Every table saw should have a smooth, heavy work surface, a handle for raising and lowering the saw blade, a separate handle for adjusting the angle of the blade and connections for dust collection. The saw should have a strong motor that starts smoothly with little vibration and enough horsepower to make deep cuts through harder woods.

Safety Equipment

Every table saw should include a blade guard, to protect the woodworker from the exposed saw blade, and a large, easily accessible on/off switch. Most modern table saws utilize a large paddle switch that is pulled to turn on the saw, and pushed to turn it off. As such, when the woodworker's hands are busy steadying the material being cut, they can turn the saw off merely pressing their knee against the switch.

Woodworking Tips for Using Your Circular Saw

Circular Saw Woodworking Tips

A circular saw is a absolute necessity for a carpenter on a construction site, but there are a number of uses for a circular saw in fine woodworking projects as well. For instance, when used with a straight-edge, a circular saw can cut sheet goods such as plywood as accurately (and with more ease) than a table saw. With special blades, a circular saw can even be used to cut curved shapes. Learn how a circular saw can be used on your fine woodworking projects. 

Woodworking Tips for Using Your Circular Saw

Circular Saws

While the table saw is probably the most useful power tool for a woodworker, for a carpenter on a job site, the most useful power tool would probably be the circular saw. A quality circular saw can be used for a wide variety of tasks both on a job site and in the wood shop, as the same tool can cross-cut and rip boards, both square to the face and at bevels of up to 45 degrees. Here are some tips to consider when choosing a circular saw.

Circular Saw Measuring Jig

When working in your shop, your table saw is always at the ready for making a variety of cuts quickly and easily. If you are on a construction site, you don't have that luxury. You can, however, make a considerable number of similar cuts on a job site using a circular saw, a straight-edge and a circular saw jig. In this guide, learn how to make a circular saw measuring jig that will let you align your straight-edge to make precision circular saw cuts quickly and easily.

Panel Cutting and Ripping Jigs

The main purpose of a woodworking jig is to make a difficult task easier, safer or easily repeatable. While many commercial woodworking jigs are available on the market, a number of woodworking jigs can be built in the woodshop. Two very useful homemade jigs are used for panel cutting and ripping boards using a circular saw. By following the step-by-step how-to instructions in this article, you can make these jigs and use them on your woodworking projects.

Choosing a Portable Wood Shop Vacuum

Many woodworking shops have central dust collection systems that are connected to all major woodworking tools in the shop to keep sawdust to a minimum. In addition to keeping the tools' work surfaces cleaner, these dust collection systems will help keep sawdust out of the tool motors, which should lead to longer life for the machinery.

Choosing a Portable Wood Shop Vacuum
The problem is that most hobbyist or professional woodworkers may have limited shop space or a limited budget that prohibits the installation of a full-scale dust collection system.

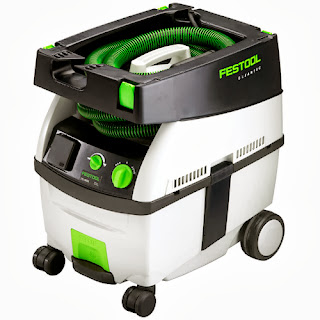
The solution? A portable wood shop vacuum (sometimes referred to as a portable dust extraction system or a wet/dry vac). These units are versatile, as many can suck up liquids as well as dry materials. However, for woodworking purposes, when choosing one of these shop vacs, there are a few features for which you should be sure to look.

Woodworking Features

The first feature to look for when choosing a woodworking vacuum is air flow. If the vacuum doesn't have a large enough motor to pull in the majority of the sawdust that your woodworking tool creates, it isn't much good. Compare the CFM (cubic feet-per-minute) ratings between different units. Typically, a motor with a higher amp or HP rating will have a higher CFM, but not always.

Second, check to see that the hose is large enough to handle your biggest woodworking tools, and that you have the ability to connect to all of your power tools. You may need to buy an accessory kit to match all of your power tool ports.

Hand Planes for Home Projects

The woodworker's favorite that never goes out of style

You can finally see the light at the end of your floor-refinishing project, but there's a stubborn gap between two floorboards that you can't ignore. Or perhaps the frame you painstakingly mitered for your neighbor's oil painting is just right except for one uneven joint. Or you have a perfectly good board of white oak, but you'd be much happier if you could give it a new surface to knock off a few nicks and bring out the beauty of its original grain.

Hand Planes for Home Projects
Planes to the rescue! These handy tools can be as simple as their name or as complex as table saws. The key is choosing the proper plane or planer for your project.

Form and Function

The purpose of all planes and planers is to shave, shear, reduce, or smooth a wooden surface. There are several categories of planes, but this guide focuses on hand-held planes, with a brief detour into motorized portable planers.

In the case of floorboard gap, a length of veneer with glue on each side can be wedged into the space; after the glue dries, a simple block plane can shear off and level the extra wood. (The same system works for split tabletops.) For an unevenly mitered frame corner, a block plane or jack plane will repair small gaps; use it front-to-back. Wider planks can be refinished by using a succession of hand planes or by bringing out the big guns: a thickness planer, either table-mounted or "portable" (expect these to be heavy enough to warrant temporary mounting).

Groovin With Routers: The Right Tool For Building Furniture & Cabinetry

Routers are all about grooves. You can make straight, square grooves with a circular saw or a miter saw, but doing so takes a long time and it's hard to get the ends of the cut to look neat. You're out of luck entirely if you need a curved slot (say, for a roll-top desk cover) or one with a non square profile (such as those used for decorative moldings). If you're going to build furniture or cabinetry, you have to be able to make grooves and create profiled edges. In other words, you need a good router.

The Two Types: Plunge and Fixed-Base

Groovin With Routers: The Right Tool For Building Furniture & Cabinetry
There are two basic varieties of routers: plunge and fixed-base. Plunge routers allow you to make cutting-depth adjustments on the fly, without having to turn off the motor. Because you can move the router into position and then lower the bit accurately, they're great for blind dadoes and other slots that don't terminate at the edge of the workpiece. They also excel at cutting mortises and following patterns. Some folks don't like plunge routers because they tend to have higher centers of gravity than fixed-base routers of similar power, and are therefore more awkward to handle. However, this isn't a problem if you plan to mount your router in a router table, which you can buy for relatively little money or make in an afternoon.

Fixed-base routers are best used for jobs that don't require midcut adjustments to the depth of the cut. They're great for dado work, cutting rabbets, and putting decorative facings on edges, and D-handled versions can be turned on and off with a trigger switch so you don't have to take your hand off the router. Fixed-base routers also tend to be smaller, lighter, and less expensive than plunge routers. Actually, you can lock a plunge router at a certain depth and use it just like a fixed-base router. But unless you have a specific need for the adjustable-depth feature of a plunge router, you'll probably be very happy with a fixed-base router.

Cordless Tools: Figuring Out Today's Cordless Tools

Try carrying a circular saw up a ladder, and the shortcomings of a power tool with a cord quickly become obvious: the cord is easy to trip over, and more than one has ended up mangled by the tool to which it's attached. Electric shocks can be a problem, especially when working near water or in the rain.

Cordless Tools: Figuring Out Today's Cordless Tools
No surprise, then, that manufacturers have long pursued the idea of cordless tools with all the ardor of a quest for the Holy Grail. The key lies not so much in designing the tools themselves after all, a circular saw is a circular saw but in designing batteries that can deliver the power needed to operate them.

Power Revolution

The earliest battery packs had about enough power to run a flashlight, and required about 24 hours to fully charge. There's been a revolution in battery power and with it an explosion in the types of cordless tools now available. Not only are the battery packs more powerful, but they can be recharged far more quickly in some cases, in as little as 15 minutes.

Mobility

Manufacturers have been steadily reinventing their power tools as cordless models. Already, there are cordless circular saws, reciprocating saws, planers, and even chain saws. While none can yet match the continuous power of traditional power tools, the new cordless tools can get most jobs done efficiently minus the irritating cords.

Power Drill Buying Guide

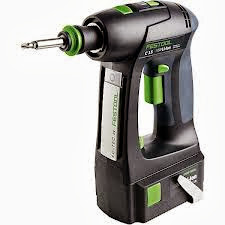
It's rare that you'll find a woodworking shop that doesn't have at least one cordless drill. It's actually two tools in one: a drill and a power screwdriver, with a two-speed gearbox that lets you select high speed/low torque for drilling and low speed/high torque for driving screws. The clutch is used for driving screws to prevent stripping out the hole or the screw.

Power Drill Buying Guide
Many woodworkers even have two (or more) cordless drills. This reduces the number of bit changes so you can have your pilot/countersink in one and your driver bit in the other. It also allows you to keep one lightweight drill and one heavyweight. The smaller and lighter-weight drills are great when you need to drill a lot of small holes or drive small screws, but you'll need more power for drilling larger holes in hardwood.

Know the Features

What it really comes down to is finding a drill (or drills) with the power you need and the comfort you desire.

Comfort

This is a personal preference. If you can, hold several drills and pretend to drill some holes with them (looking funny in the store for a few minutes will pay off with years of comfort). Is the handle comfortable, or too big, or too small? Is the head angle (the relationship of the driver to the handle) correct for you? How easy is it to change direction? In most cases, you'll find a few that are much more comfortable to you than the others.

Power

Higher-voltage batteries provide more power. Although more expensive, NiMH batteries appear to have a longer run time per pound than ni-cad, but the jury is still out on this one.

Drill Presses: Get The Hole Story

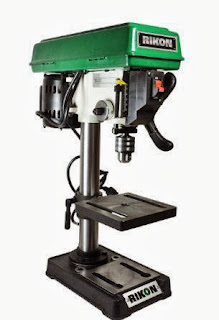
When it comes to making holes of a uniform angle and depth in wood, metal, and synthetics, you just can't beat a drill press. Sure, you can bumble along with a hand-held drill for less money, but craftspeople who aim to make top-quality products need the consistency that only a drill press can provide.

Drill Presses: Get The Hole Story
Among drill presses, you'll find two basic classes of equipment:
  • Bench drill presses: Use these presses for smaller jobs; they are meant to be bolted or clamped to the top of a bench or stand.
  • Floor drill presses: These presses are bigger, freestanding machines. They have bases that sit directly on the floor of your shop and extend upward so you can comfortably manipulate the tool while sitting on a high stool or standing.

Check the Specs

When buying a drill press, carefully read the product descriptions to find out how any model you're considering stacks up to the following specifications.
  • Motor: Drill presses run on electric motors rated in horsepower. Make sure the motor in the model you choose is powerful enough for the work you do. Bench drill presses typically have motors rated between .3 hp and .5 hp. Floor drill presses have motors rated between .75 hp and 1.5 hp. Choose the highest power rating you can afford, because on any given job a more powerful motor will be less strained and will therefore last longer.
  • Speed control: You'll want to adjust the speed at which your bits spin to suit different materials. Drill presses typically allow you to vary the spin rate between about 500 rpm (revolutions per minute) and 3500 rpm. Some provide a series of specific speed settings (such as 500, 1000, 1500, 2000, 2500, and 3500 rpm), which is fine for most applications. Fancier models may feature continuously variable electronic speed controls.
  • Throat depth: Because of their design, drill presses are limited by the distance between the center of the spindle (where the bit goes) and front edge of the vertical post that supports the drill head a measurement called throat depth. If you want to drill a hole in the center of a round workpiece such as a tabletop, the radius of the workpiece must be less than the throat depth.
  • Spindle travel: The spindle of a drill press moves up and down only so far. This range of motion is called spindle travel, and it determines the maximum depth of the holes you can bore.
  • Table adjustments: Most drill presses have a tilting worktable some tilt 45 degrees left and 45 degrees right while others can tilt a full 90 degrees in each direction. Make sure the drill press you buy can handle the kinds of angles you work with. The table should swing in the horizontal plane, too good ones can spin completely around the post.
  • Head adjustments: Some drill presses supplement a tilting table with a tilting drill head. Tilting heads typically move 45 degrees left and right, and ease the mind-bending work of compound angles. With tilting heads and tilting tables, make sure you're comfortable with both the adjustment mechanism and the angle gauge.

Buying Guide to Generators: Power up

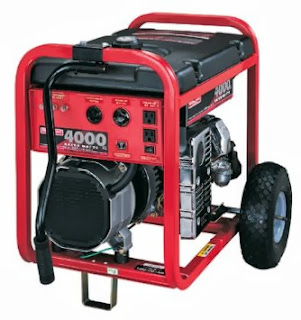
Generators put you in control of your power source. And when you're faced with an unexpected outage, standby power can be more than handy. Depending on your needs, you can buy a reliable generator for as little as a few hunderd dollars or spend up to $8,000 for a deluxe model. With such a wide price range, it's important to choose a generator tailored to your situation.
Buying Guide to Generators: Power up

Selecting a Size

Before buying, you'll need to determine how much power you'll require from a generator, which is rated in watts.
  • Decide which appliances you can't live without. Refrigerators, microwaves, furnace fans, lights, televisions, and radios head many people's necessity lists.
  • Calculate how much electricity those items need by checking each product's faceplate or owner's manual.
  • Find the total wattage of all your necessary appliances. The generator you buy needs to deliver at least that much wattage and preferably a bit more.
Warning: Appliances with motors (such as freezers, refrigerators, and furnace fans) require additional wattage to start. A 700-watt refrigerator, for instance, could require an additional 2,200 watts when firing up. If you plan to start a group of motors simultaneously, you'll need a generator with the capacity to supply the necessary starting current for the total wattage. Without sufficient starting power, motors can overheat, burn out, or trip the generator's circuit breaker.

Dust Collectors Buying Guide: Work Cleaner! Breathe Easier!

If you work with wood even if it's just in your home workshop on weekends, you're wise to invest in a dust collector. Wood dust (a.k.a. sawdust) is a documented health hazard. Exposure to wood dust has been linked to external and internal health problems ranging from dermatitis to cancer.

With the right piece of dust collection equipment in place, your work or hobby environment will be cleaner, more pleasant, and healthier for you and your family.

Dust Collectors Buying Guide: Work Cleaner! Breathe Easier!

Important Features

Airflow: The basic standard of measure used to rate dust collectors is "the volume of air they can move (cfm or cubic feet per minute) at a given static, or constant, pressure (resistance to airflow measured in inches of water)." Phew! What that means: Buy a dust collector with enough cfm to handle the dust output of your biggest dust-generating machine. If your shop runs more than one machine at a time, you'll need a dust collector that can cope with their combined dust output.
Not sure how much cfm the tools you work with require? Consult the list below.
  • Planer, up to 12 inches: 400 cfm
  • Planer, 13 to 20 inches: 500 cfm
  • Spindle shaper: 400 cfm
  • Band saw: 300 cfm
  • Radial-arm saw: 350 cfm
  • Table saw: 350 cfm
  • Jointer, 4 to 12 inches: 350 cfm
  • Belt-disc sander: 300 cfm
  • Floor sweep: 350 cfm
  • Lathe: 500 cfm
  • Drill press: 300 cfm
  • Scroll saw: 300 cfm
Static pressure: Quoted in inches, static pressure measures the strength of a machine's air suction. The higher the cfm and static pressure numbers, the stronger the dust collector.

Jointers Buying Tips: Taking Rough Wood To Next Level

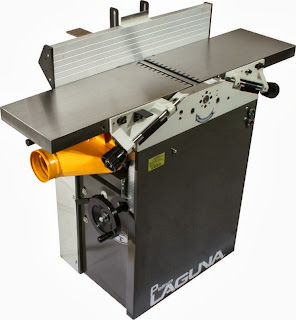
There's an elemental pleasure to be derived from using a jointer. You start with a ragged-edged piece of wood. You turn it on its side and run it over the jointer's spinning knives. The stock that comes out the other side has a smooth, straight, planed edge. The jointer is the first step in transforming rough pieces into finished products.

Jointers Buying Tips: Taking Rough Wood To Next Level

Size Up Your Options

Like many shop tools, jointers come in bench and floor varieties. Bench jointers are relatively small units that are meant to be bolted to a stand or a tabletop. The larger floor jointers are mounted on a heavy base that sits directly on the floor of your shop.

Manufacturers and retailers also group jointers by the size of their knives. You'll see listings for 6-inch, 8-inch, and (for industrial applications) 12-inch jointers. The measurement refers to the maximum surface width the jointer can act upon. For most hobbyist work, a 6-inch jointer is adequate; such a jointer can comfortably handle the broad face of a two-by-six. Be aware that manufacturers' dimensions aren't always precise: jointers of almost any size can handle up to a quarter-inch more than their measurement implies.

Random Orbit Sanders: Gguide To The Real Nitty Gritty

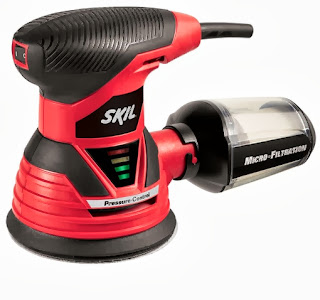
Whether you're trimming a window with molding or framing a set of kitchen cabinets, no job reaches its final stage until its surface has been sanded smooth. Paint, stain, or varnish spread over rough wood looks downright sloppy, and the job of properly preparing the surface belongs to an orbit sander.
Random Orbit Sanders: Gguide To The Real Nitty Gritty

Its cousin the belt sander is fitted with a loop of gritty paper that can grind big gouges in wood if held in place too long, like a car tire that's spinning in the mud. Orbit sanders maneuver with greater delicacy and are more forgiving. Fitted with small pads of sandpaper, they buff the surface of wood rather than strafe it. And by moving through a succession of grits, beginning with coarse and moving on up to superfine, it's possible to produce a wood surface as smooth as glass.

Orbit sanders come in two distinct varieties:
  • Sheet sander
  • Random orbit sander

Sheet Sanders

The sheet sander, which has been on the market for 50 years, is fitted with square or rectangular pieces of sandpaper that are cut to size then clamped into place. When turned on, the pad moves in a small circular pattern. When in use, the tool has to be pushed along with the grain of the wood to minimize surface scratches exactly as is done with hand sanding. Try pushing it against the grain, and the sander will leave a trail of tiny spirals that require even more sanding to remove.

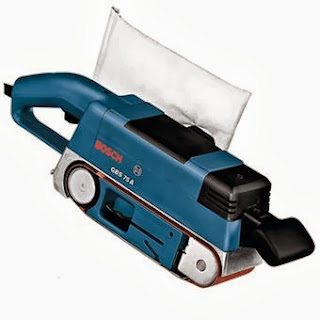
Belt Sanders: The "Bulldozer" Tool, Understanding The Sand & The Fury

A belt sander looks and acts - like the bulldozer of the toolbox. Applied to a piece of wood, the tool's continuous band of sandpaper tears effortlessly through layers of old paint or patches of rough wood to reveal a fresh surface underneath. Used carefully, belt sanders can make quick work of stock that would otherwise have to be laboriously sanded by hand. But like a grinder, the belt sander has a relentless fury. If held in one place even an instant too long, it will make irreparable gouges in the very surface you're trying to smooth.

Belt Sanders: The "Bulldozer" Tool

How It Works

Regardless of size, all belt sanders operate on the same principle: a loop of sandpaper wraps around a rear roller and a front roller, creating tension between the two. When the sander is switched on, the rear drive roller (which is usually connected to the motor) spins, causing the sanding belt to move forward like the tread of a bulldozer. This is far more aggressive than an orbital sander, in which the sanding pad rotates in a very small circle. But belt sanders can take on far bigger jobs: old layers of paint can disappear with one swipe of the tool, and a wide piece of wood can be leveled smooth with just a few passes.

All About Size

Sanding belts typically range from 3 inches wide by 18 to 21 inches in circumference to 4 inches by 24 inches for large models. Smaller belt sanders have also begun to appear on the market. Some feature belts just over 1 inch wide, with a front roller that's smaller than the rear roller. This narrows the point of the belt, making it easier to control and maneuver into hard-to-reach areas, such as the gaps between railing posts on an outdoor deck. Despite the tame appearance of these smaller tools, they're still wild at heart and can easily damage wood if you don't keep them in motion.

Dealing with Dust

Belt sanders generate a lot of dust which is a health hazard, especially when you're sanding pressure-treated wood or wood whose surface contains lead-based paint. Dust bags attached to the tools help to gather up the sawdust and reduce the amount that floats in the air or clogs up the grit on the sanding belt. The highest-quality belt sanders can be hooked up directly to shop vacuums, which suck away all the dust. This system keeps the belt cleaner, and you'll get more mileage out of it as a result. (See our guide on dust collectors.)

Insider Information About Circular Saw

Cut through a two-by-six or a piece of plywood with a hand saw, and there's likely to be not just a lot of huffing and puffing, but a meandering line as well. Yet switch on a circular saw, and the cut will come out straight and easy.

Insider Information About Circular Saw
Circular saws are the workhorses of any construction job, from framing an addition to building a tree house. They glide through lumber in seconds, and can be fitted with an assortment of blades that rip through everything from nail-embedded wood to concrete blocks and bricks.

The saws come in a variety of sizes, but the most popular contains a blade 7.5 inches in diameter. The blade on most models can be adjusted to cut on a bevel up to 45 degrees, which is useful in cutting boards to frame the pitch of a roof. Larger jobs, such as cutting the timbers used for post-and-beam construction, require saws with blades of at least 12 inches in diameter. Correspondingly, lighter saws with reduced blade circumference should be used for smaller projects such as cutting plywood or two-by-fours. Regardless of the size of the blade, circular saws come in two varieties.

Worm-Drive Saws

A worm-drive saw is the toughest, most powerful circular saw, making it the right choice for heavy-duty jobs like framing an entire house or sawing through concrete. The saw derives its name from a pair of gears, the worm and the work gears that position the motor shaft and the blade at right angles to each other. This gives the tool its characteristically broad shape.

Band Saws Buying Guide, Finding The Right Tool

Bring Out the Band Saws: Finding The Right Fine-Finish Tool For You

A circular saw may be portable, and a jig saw may be able to make a plunge cut into the center of a piece of wood, but only a band saw can produce a truly finished piece of wood. As the thin steel blade zips along at upwards of 2,000 feet per minute, the wood it parts emerges with a clean edge, as if it's been polished with fine-grain sandpaper.

Band Saws Buying Guide, Finding The Right Tool
A band saw gets its name from the blade itself, a giant loop that's stretched between two or three wheels and pulled through a small hole in a cutting table. Its blade is thin far thinner than that of a circular saw and can cut not only straight lines, but also graceful curves. This makes band saws a favorite among everyone from boat builders to furniture makers. With the right blades, these versatile saws can cut plastic and metal as well as wood.

Band Saw Basics

You can't just toss a band saw into your toolbox the way you can a circular saw. The biggest floor models, which can cut massive beams lengthwise, weigh nearly a ton. There are more modest versions that sit on special stands, but even smaller bench-top versions, which might be considered portable, would be hefty to tote.

Measurements Regardless of their overall dimensions, band saws are classified by the diameter of the wheels that hold their blade in place. That dimension is slightly greater than the one that really counts: throat capacity. Measured by the distance between the blade and the throat, the supporting post that connects the top and bottom wheels throat capacity determines the maximum width of board the saw can handle.

Miter Saws & Compound Miter Saws Buying Guide

Miter Saws and Compound Miter Saws: The Motorized Revolution

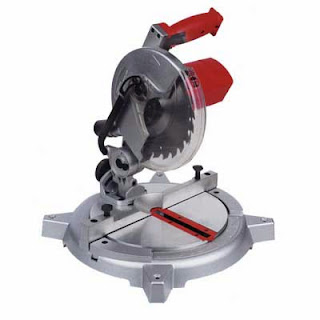
It wasn't that long ago that making accurate crosscuts in wood required a skilled hand, a sharp handsaw, and a chunk of time. But in the early 1970s, a new saw began to appear on job sites that promised to speed up these cuts: the motorized miter saw. A simple miter saw is essentially a lightweight circular saw mounted on a spring-loaded pivoting arm supported by a metal base.
Miter Saws & Compound Miter Saws Buying Guide
While these relatively small, inexpensive saws don't have the cutting capacity of a radial arm saw, they are very portable and rugged enough to stand up to daily use (and abuse) on the job and survive the pickup truck ride to the next job.

Cutting Capacity

A miter saw with a 10-inch blade and a hefty 12 to 15 amp motor can make quick, accurate 90-degree cuts in two-by-fours and two-by-sixes. If you rotate the blade left or right, they can also make miter cuts, and some of them can be pivoted past 45 degrees in one or both directions. But 10-inch saws have one major limitation: cutting capacity. Most of them are limited to about a 5 1/2-inch cut at 90 degrees, and even less when cutting miters.

For this reason, some manufacturers also offer miter saws with 12-inch, 14-inch, and even 15-inch diameter blades, which enables them to make cuts that are wider (up to about 7 1/2 inches) and higher (up to about 3 1/2 inches). For some users, this capacity still isn't enough for the job, which is why the pricier but more versatile, sliding compound miter saws have become so popular. In fact, regular chop saws are disappearing from the marketplace.

Reciprocating Saws Buying Guide

Saw It All: How to choose a reciprocating saw

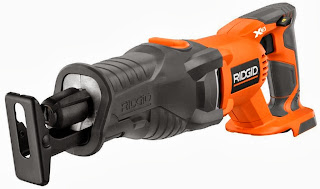
If you've never used a reciprocating saw, you might wonder whether you really need one, especially if you have a good circular saw and an assortment of handsaws. But if your project involves any kind of renovation or remodeling work, the answer is an unqualified yes.
Reciprocating Saws Buying Guide
With a reciprocating saw, you can quickly cut out old framing and sheathing to make way for new doors and windows, and with the right blade you'll be able to power through pipes, nails, shingles, and wires, sometimes all at once. A true professional's tool, reciprocating saws will get you into places to make cuts that can't be made with any other type of saw.

Saw History: I Came, I Sawzall'd, I Conquered

Back in 1951, the Milwaukee Electric Tool Corporation introduced an electric saw that mimicked the back-and-forth motion of a handsaw rather than relying on the rotary cutting action of a circular saw blade. This early Sawzall, as reciprocating saws are still often called, was pretty basic: a metal case containing a 4 amp motor controlled by a simple on/off trigger. I have one of these machines, and it's been a reliable and indestructible companion over the years. But I have to admit that in my heart, I lust after one of the new generation of reciprocating saws: they're more powerful; they have bigger strokes (the distance traveled by the blade); they provide more strokes per minute, so that they cut faster; and they offer features that give them more precision and versatility like variable speeds and orbital action.

How To Purchase A Scroll Saw

Cutting Curves

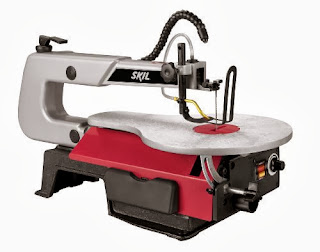
Band saws and jig saws can cut curves, but as power tools they're fearsome and often dangerous to use. The scroll saw, by comparison, is a domesticated beast. Its strand like blade, which is just 3 to 5 inches long, moves between two parallel arms that pulsate rapidly up and down through a hole in the cutting table. So gentle is the motion, however, that if you accidentally touch the blade with your finger, it probably won't even make a cut.

How To Purchase A Scroll Saw
For this reason, the scroll saw is a delight for the hobbyist. It is a favorite for turning out thin wood panels known as fretwork that can be used for boxes or wall decorations, and for creating fancy details for brackets and even the Victorian gingerbread trim used on porches.

Beyond that, scroll saws can be fitted with an assortment of blades that can cut everything from hard acrylic to bathroom tiles with ease, making it a good all-purpose saw as long as the job is a small one.

Speed and Cutting: Choosing a Model

Despite some slight variations, all scroll saws function in a similar way, what distinguishes them is the price and certain features that make cutting easier and more precise.
  • Low-end: At the low end of the spectrum below $200 lie single-speed models, in which the blade moves up and down at a fixed rate. These machines can effortlessly cut through inch-thick pieces of softwood such as pine and thinner pieces of hardwood, but they may begin to labor if cutting through anything thicker or harder. Beyond their weak cutting capacity, these saws, like low-end cars offer bumpy rides to anyone who uses them. They're noisy, which makes it difficult to tolerate them for long stretches, and they tend to vibrate, which makes it hard to hold down a piece of wood in order to follow the lines on the paper.
  • Midrange: Since scroll sawyers tend to spend hours and hours behind the blade, more expensive models include features that make them more comfortable to use. Midpriced models from $400 to $600 vibrate less, and are also quieter. The blades can be operated at two or more speeds or, better still, at variable speeds ranging from 300 to 2,000 strokes per minute. This gives the operator the ability to cut cleanly through thicker pieces of wood. Another important feature for people who use the scroll saw to make intricate cuts is a quick-change blade clamp. This eliminates the need to tighten the blade with a wrench, and can remove some of the tedium of the work.
  • Professional: Saws at the high end of the scale upwards of $1,000 have still less vibration, which results in a smoother cut that does not need any sanding at all. These will also contain blowers that whisk away dust from the cut so you can follow the line, as well as lights and magnifying glasses to make it easier to see what you're doing. These features are available on mid priced models as well, making those a better choice for anyone but full-time professionals.

Jig Saws Guide: No Need To Be Puzzled

With its tiny blade extending straight downward, the jig saw may look like the weakest member of the saw family. But its ability to cut graceful curves, as well as its portability, make it one of the most sought-after power tools.

Jig Saws Buying Guide
Circular saws cut far faster than jig saws but only in a straight line. And while large band saws can turn out graceful curves and loops, they can't exactly be dropped into a toolbox. The jig saw's combination of cutting agility and lightweight size make it ideal for cutting out sink holes in counter tops, cutting openings for electrical outlets, making decorative scrolls for cabinets or shelf brackets, and scribing trim to make it conform to an uneven surface such as brick or stone.

And, yes, it can even cut out the puzzles that bear its name.

No matter what the brand, jig saws operate in the same way: a stubby blade that extends downward from the motor housing moves up and down at a rate of up to 3,000 strokes per minute. They're not the fastest saws in the shop, but they're precise and the ability to maneuver them carefully is crucial.

Handle Styles

Something to Hold Because of its precise nature, more attention is paid to the type of handle a jig saw is equipped with than just about anything else.
Two types exist:
  • Most American-made models come with a handle that forms a loop at the top of the housing. It's comfortable to hold.
  • Many European models come equipped not with a separate handle, but a grip that surrounds the motor housing similar to the type found on orbital sanders. This allows a closer connection with the tool that some people prefer because it gives a greater sense of control.